部署Nagios监控系统三
在第二部分(https://www.roamway.com/?p=511),监控界面已出现,但有很多异常及不完善的地方。
这一部分将进一步在原有基础上修改,实现基本监控功能。
1.编辑services.cfg文件
vim /usr/local/nagios/etc/objects/services.cfg 将以下服务前的注释去掉,保存退出。

2.将所有define service 后面都加上以下内容
check_period 24×7
max_check_attempts 4
normal_check_interval 5
retry_check_interval 1
contact_groups admins
notification_options w,u,c,r
notification_interval 960
notification_period 24×7
如下所示:
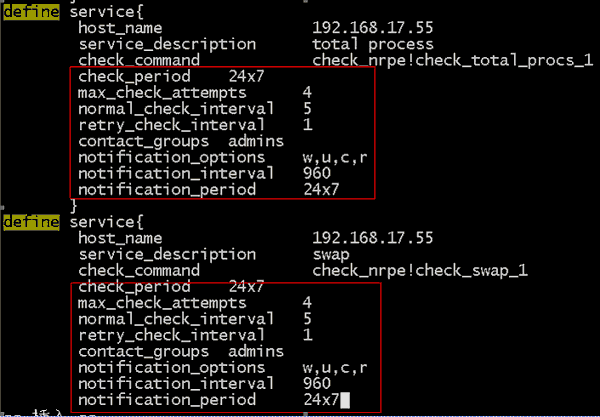
保存退出
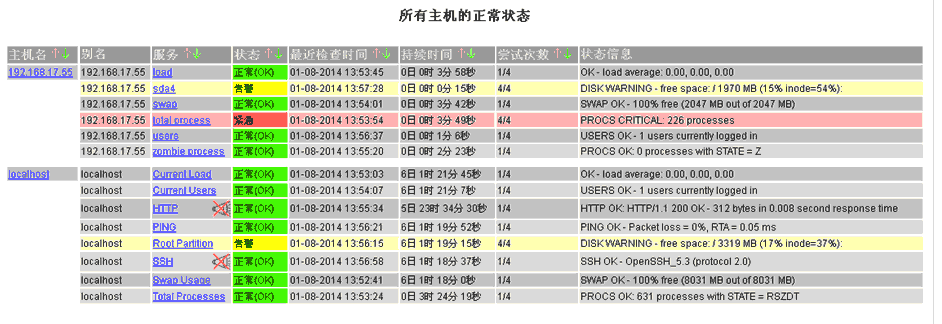
3.重启nagios,可见192.168.17.55的6种服务全部监控上了,但还需添加web服务,如下图所示:
4.增加监控192.168.17.55的http服务
服务端 vim /usr/local/nagios/etc/object/services.cfg 增加图片中的内容
define service {
host_name 192.168.17.55
service_description HTTP
check_period 24*7 check_nrpe!check_http1
max_check_attempts 4
normal_check_interval 5
retry_check_interval 1
contact_groups admins
notification_options w,u,c,r
notification_interval 960
notification_period 24*7
}
保存退出
192.168.17.55客户端 vim /usr/local/nagios/etc/nrpe.cfg 增加以下内容
command[check_http1]=/usr/local/nagios/libexec/check_http -I 192.168.17.55
保存退出
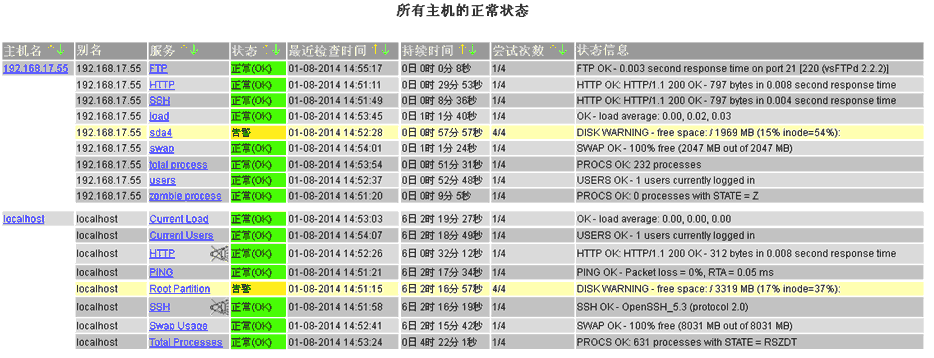
5.重启nrpe和nagios,下图看出192.168.17.55的web服务已经监控到了。
6.监控windows系统
请从http://nsclient.org/nscp/downloads下载NSClient++-0.3.9-Win32.zip
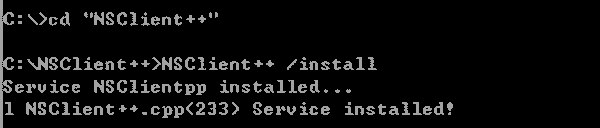
解压到C盘根目录,切换到C:\NSClient++目录下,执行NSClient++ /install安装
7.编辑C:\NSClient++ 下的nsc.ini文件
将[modules]部分的所有模块前面的注释都去掉,除了CheckWMI.dll and RemoteConfiguration.dll这两个
在[Settings]部分设置’password’选项来设置密码,作用是在nagios连接过来时要求提供密码.这一步是可选的
选择不要密码;将[Settings]部分’allowed_hosts’的注释去掉,加上nagios的监控主机的IP.改为如下格式
allowed_hosts=127.0.0.1/32, 192.168.18.7/32
必须保证[NSClient]的’port’选项并没有被注释,并且它的值是’12489′,这是NSClient的默认监听端口

保存退出
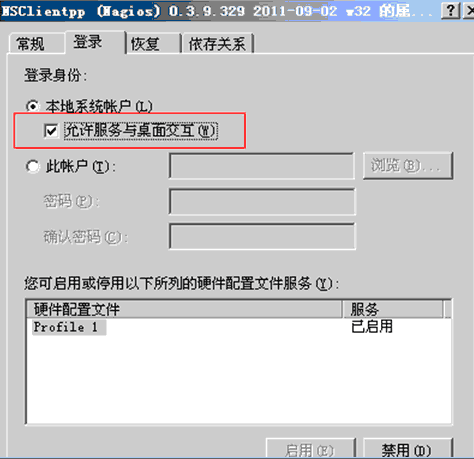
8.在Windows服务列表中找到NSCLientpp服务,右击选择属性,将其设置为自动启动。
然后点”登录”标签,在”允许服务与桌面交互”前打勾并确定。
9.查看windows客户端是否监听了12489端口,如下所示:
![]()
10.防火墙添加12489端口例外并确定,至此window被监控端配置完毕。
11.监控端vim /usr/local/nagios/etc/nagios.cfg
添加cfg_file=/usr/local/nagios/etc/objects/windows.cfg
保存退出
vim /usr/local/nagios/etc/nagios.cfg
添加如下内容:
define host{
host_name 192.168.17.60
address 192.168.17.60
contact_groups admins
check_command check-host-alive
max_check_attempts 5
notification_interval 10
notification_period 24*7
notification_options d,u,r
}
保存退出
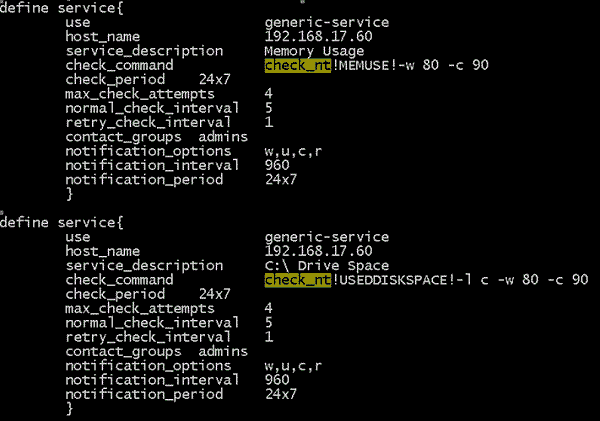
12.监控端cat /usr/local/nagios/etc/objects/windows.cfg 这就是windows服务器模板,定义了许多服务。
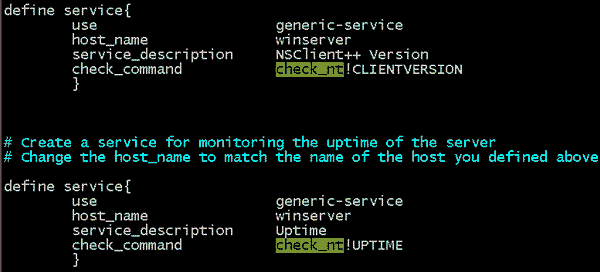
将需要的服务复制到services.cfg文件下,并将host_name更改为192.168.17.60, 因为要监控主机
192.168.17.60 ,再添加相应的监控周期,如下图所示:
保存退出
13.重启nagios,浏览器键入http://192.168.18.7/nagios 监控成功。

以上监控的都是windows的系统硬件内容。