Nginx反向代理和负载均衡配置
服务器平台 CentOS 6
负载调度: 192.168.137.16 Nginx-1.5.2
server1: 192.168.137.17 Nginx整合php
server2: 192.168.137.18 Nginx整合php
mysql-proxy: 192.168.137.26 mysql-proxy
mysqlmaster: 192.168.137.27 mysqlmaster
mysqlslave1: 192.168.137.28 mysqlslave1
mysqlslave2: 192.168.137.29 mysqlslave2
WIN7客户端 192.168.137.1 IE内核浏览器
实现过程: 客户端发出请求,被解析到了负载调度服务器的IP,调度服务器根据均衡算法 将请求转发给
成员服务器server1或server2, 成员 服务器处理请求,通过直接找到静态数据或这查询后端的mysql主从
集群,将结果返回给负载调度服务器,最后客户端收到了来自负载调度服务器的结果。
1. 负载调度服务器安装nginx-1.5.2
(1)执行rpm -qa检查gcc , gcc-c++ ,make ,libtool等是否安装,如果没有请使用rpm或yum命令安装。
(2)安装openssl库
tar zxvf openssl-1.0.1c.tar.gz
./configure (不需要添加自定义参数)
make && make install
(3)安装pcre
tar -zxvf pcre-8.34.tar.gz
./configure –prefix=/usr/local/pcre
make && make install
(4)安装zlib最新库文件
tar zxvf zlib-1.2.8.tar.gz
./configure –prefix=/usr/local/zlib
make && make install
(5)安装nginx-1.5.2
groupadd -r nginx
useradd -r -g nginx -s /bin/false -M nginx
nginx配置参数
./configure –prefix=/usr/local/nginx \
–error-log-path=/var/log/nginx/error.log \
–http-log-path=/var/log/nginx/access.log \
–pid-path=/var/run/nginx/nginx.pid \
–lock-path=/var/lock/nginx.lock \
–user=nginx \
–group=nginx \
–with-http_ssl_module \
–with-http_stub_status_module \
–http-proxy-temp-path=/var/tmp/nginx/proxy \
–http-fastcgi-temp-path=/var/tmp/nginx/fcgi \
–with-pcre
编译安装
make && make install
启动nginx
/usr/local/nginx/sbin/nginx -c /usr/local/nginx/conf/nginx.conf
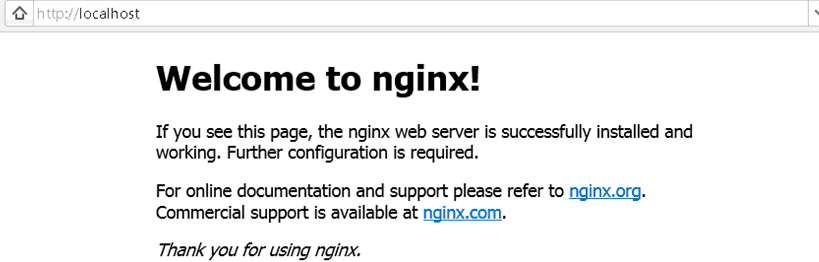
浏览器输入http://localhost 成功返回nginx页面。
(6)nginx配置
vim /usr/local/nginx/conf/nginx.conf
在http模块下,添加upstream部分,根据需要选择合适的算法,若成员服务器性能差异较大,
则可设置合适权重(weight), 权重越高的成员,得到请求的概率越大。
upstream 192.168.137.16 {
ip_hash;
server 192.168.137.17:80;
server 192.168.137.18:80;
}
修改location /部分,这部分表示接受任何请求,现在只需将接收的请求转发到http://192.168.137.16,
upstream按照某种均衡算法分配给server1和server2处理。
如下:
location / {
# root html;
# index index.html index.htm;
proxy_pass http://192.168.137.16;
proxy_set_header Host $host;
proxy_set_header X-Real-IP $remote_addr;
proxy_set_header X-Forwarded-For $proxy_add_x_forwarded_for;
}
最后保存退出,重启nginx,负载调度服务器配置完毕。
2. 成员服务器 server1和server2配置
由于成员服务器是真正执行请求处理的,要么直接返回静态查询结果,要么通过php连接mysql动态返回结果,
因此成员服务器需要安装nginx并整合php ,mysql可安装到同一台服务器上,也可安装在其他服务器上。这里
选择另外部署三台mysql服务器,并配置主从同步,实现读写分离。为高并发访问提供强有力支持。
server1和server2的配置可参考本站LNMP环境搭建
LNMP安装成功后,开放80和3306端口。编辑 nginx.conf ,修改域名为www.roamway.com
配置文件如下:
user nginx nginx;
worker_processes auto;
error_log /var/log/nginx_error.log ;
pid /usr/local/nginx/logs/nginx.pid;
#Specifies the value for maximum file descriptors that can be opened by this process.
worker_rlimit_nofile 5120;
events
{
use epoll;
worker_connections 5120;
multi_accept on;
}
http
{
include mime.types;
default_type application/octet-stream;
server_names_hash_bucket_size 128;
client_header_buffer_size 32k;
large_client_header_buffers 4 32k;
client_max_body_size 50m;
sendfile on;
tcp_nopush on;
keepalive_timeout 60;
tcp_nodelay on;
fastcgi_connect_timeout 300;
fastcgi_send_timeout 300;
fastcgi_read_timeout 300;
fastcgi_buffer_size 64k;
fastcgi_buffers 4 64k;
fastcgi_busy_buffers_size 128k;
fastcgi_temp_file_write_size 256k;
gzip on;
#limit_conn_zone $binary_remote_addr zone=perip:10m;
##If enable limit_conn_zone,add “limit_conn perip 10;” to server section.
server_tokens off;
#log format
log_format access ‘$remote_addr – $remote_user [$time_local] “$request” ‘
‘$status $body_bytes_sent “$http_referer” ‘
‘”$http_user_agent” $http_x_forwarded_for’;
access_log off;
server
{
listen 80;
server_name www.roamway.com;
index index.html index.htm index.php;
root /usr/local/nginx/html;
#error_page 404 /404.html;
include enable-php.conf;
location /nginx_status
{
stub_status on;
access_log off;
}
location ~ .*\.(gif|jpg|jpeg|png|bmp|swf)$
{
expires 30d;
}
location ~ .*\.(js|css)?$
{
expires 12h;
}
location ~ /\.
{
deny all;
}
access_log /var/log/nginx/access.log access;
}
include vhost/*.conf;
}
新建文件phpinfo.php,写入如下代码:
<?php
phpinfo();
?>
浏览器分别输入
http://192.168.137.17/phpinfo.php, http://192.168.137.18/phpinfo.php
可以看到server1和server2的php解析效果。
3. 导入网站
利用FTP客户端,将我的网站www.roamway.com和数据库下载至本地,如下:
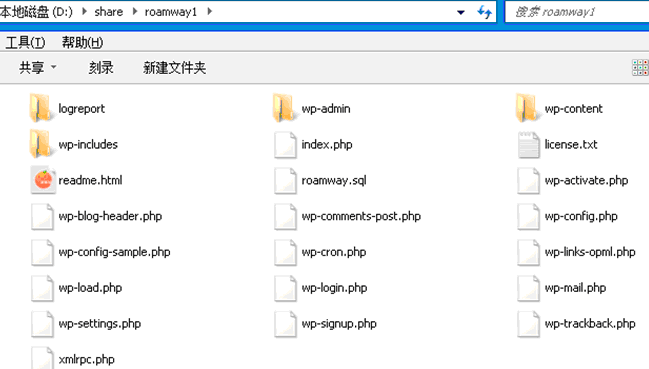
再将其上传至server1的网页目录,/usr/local/nginx/html

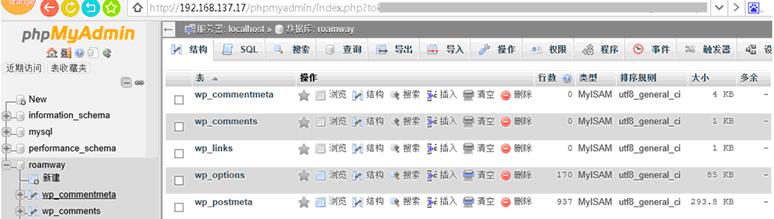
利用phpmyadmin工具,创建一个roamway数据库,然后上传roamway.sql,结果如下:
server2和server1操作相同,不再赘述。
4. 客户端测试
windows客户端在hosts文件中添加主服务器192.168.137.16和www.roamway.com的解析关系,
当然也可以配置DNS服务器,添加正反向解析,请参考:https://www.roamway.com/?p=993
ping www.roamway.com, 已成功解析到192.168.137.16

为了验证负载均衡是否真的实现,在server1和server2的网站目录新建首页index.html
里面写入service1: 192.168.137.17或server2: 192.168.137.18 保存退出。
浏览器测试一下,反复刷新,下面两个页面循环出现。


删除server1和server2网页目录下的index.html文件。浏览器键入www.roamway.com
结尾:以上Nginx负载均衡配置演示只是一个大概过程,实际操作会复杂很多。另外出现了一个小插曲,
在mysql编译过程中的突然停电,造成资料丢失和很多未知故障,在耐心坚持下,配置才得以继续。
这次配置以Nginx反向代理,集群为主。mysql主从同步和读写分离,会在时间允许情况下演示。
附:最新编译参数
nginx version: nginx/1.15.3
built by gcc 4.4.7 20120313 (Red Hat 4.4.7-4) (GCC)
built with OpenSSL 1.1.1-dev xx XXX xxxx
TLS SNI support enabled
configure arguments: –user=www –group=www –prefix=/usr/local/nginx \
–with-http_stub_status_module –with-http_ssl_module –with-http_v2_module \
–with-http_gzip_static_module –with-http_sub_module –with-http_realip_module \
–with-openssl=/usr/local/openssl/ –with-openssl-opt=’enable-tls1_3 enable-weak-ssl-ciphers’ \
–with-cc-opt=-DTCP_FASTOPEN=23 –with-file-aio \
–http-client-body-temp-path=/var/tmp/nginx/client/ \
–http-proxy-temp-path=/var/tmp/nginx/proxy \
–add-module=/usr/local/nginx-ct/ –add-module=/usr/local/nginx_upstream_check \
–without-mail_pop3_module –without-mail_imap_module –without-mail_smtp_module \
–without-http_uwsgi_module –without-http_scgi_module
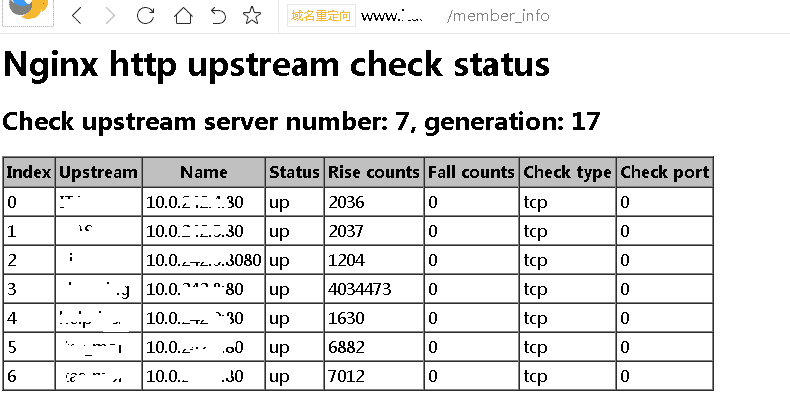
nginx upstream module example